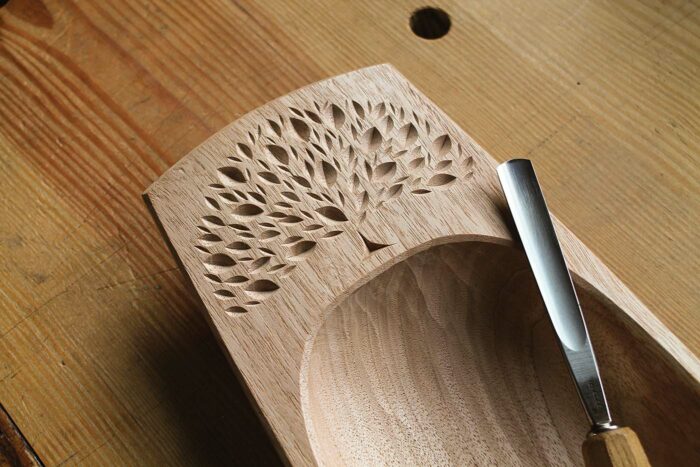
Synopsis: David Fisher shows here how to carve a decorative tree, which he did for the bowl featured in his companion article Carve a Bowl from a Board but can be done elsewhere, such as on the lid of a box or the front of chest. The process involves establishing a simple layout, custom grinding a gouge, and making lots of opposing gouge cuts for the leaves.
 I designed this stylized chip-carved tree to decorate the handles of the bowl I write about in “Carve a Bowl from a Board,” but it could also be effective as a decorative element elsewhere, such as on the lid of a box or carved in a series on the front of a chest. The incised almond shapes capture light and shadow beautifully, evoking late afternoon sunlight filtering through tree leaves. Carving them is very approachable; a simple matter of making opposing gouge cuts, it works in any wood species, regardless of hardness.
How to lay out a tree
Before you pick up your carving tools, establish the overall shape of the tree lightly in pencil. If you are carving it on this bowl, start by drawing a vertical centerline, then make a tick mark across it 7/8 in. from the edge of the bowl’s hollow. Set a compass to a 2-1/4-in. radius, place its point on that tick mark, and strike a hemispherical arc. That line will define the outer limits of the tree’s crown.
|
|
|
|
To define the bottom of the crown, reset the compass to 3-3/8 in., place its point at the top center of the tree, and make tick marks crossing the lower portion of the hemispherical arc on both sides. Then draw a sinuous S-curve on each side from the tick mark on the arc to a point about 1/8 in. below the original focal point on the centerline. Inside the crown of the tree, draw a few more curves in concert with the S-curves. Finish the outline of the tree by drawing the trunk: three short, curved lines in the form of a triangle.
Custom grind a leaf gouge
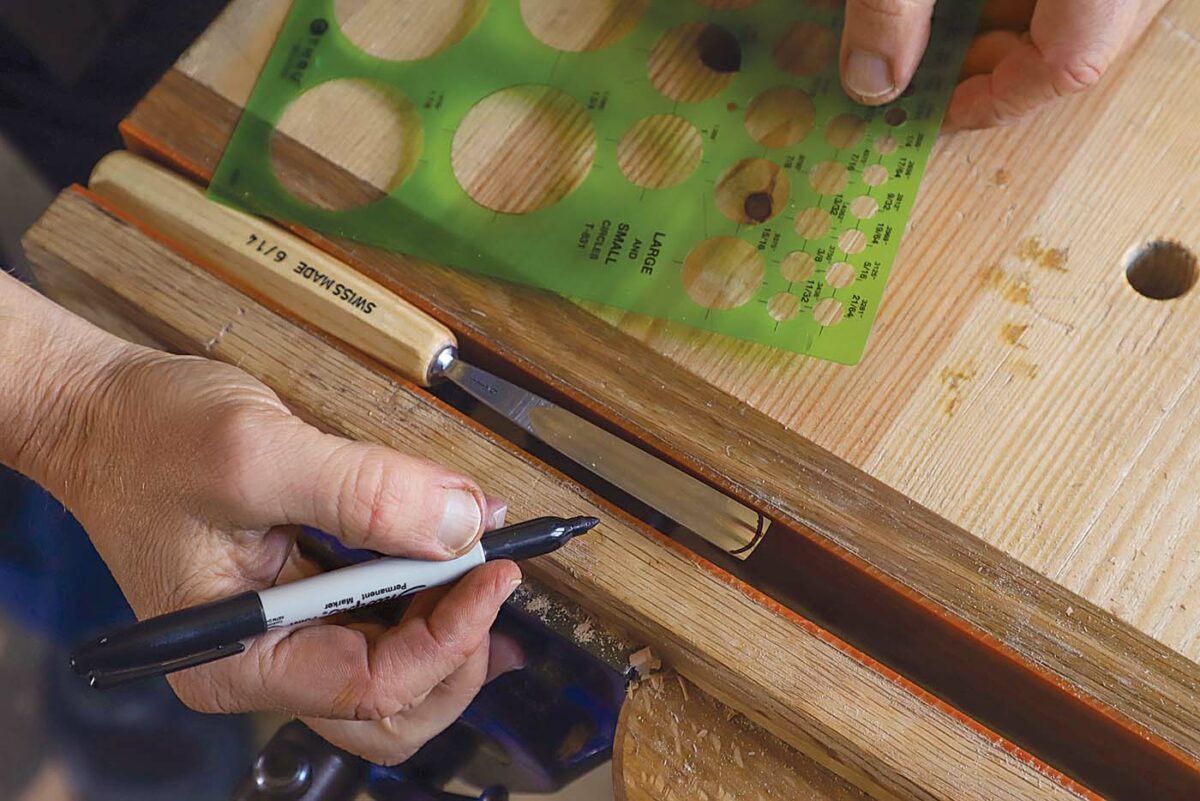
All the leaves will be formed by opposing cuts with a gouge. In order to get the cuts to meet cleanly in the middle, I grind a gouge to a bullnose edge. A gouge with this profile can occasionally be useful for other things as well, so it’s handy to have around.
|
|
|
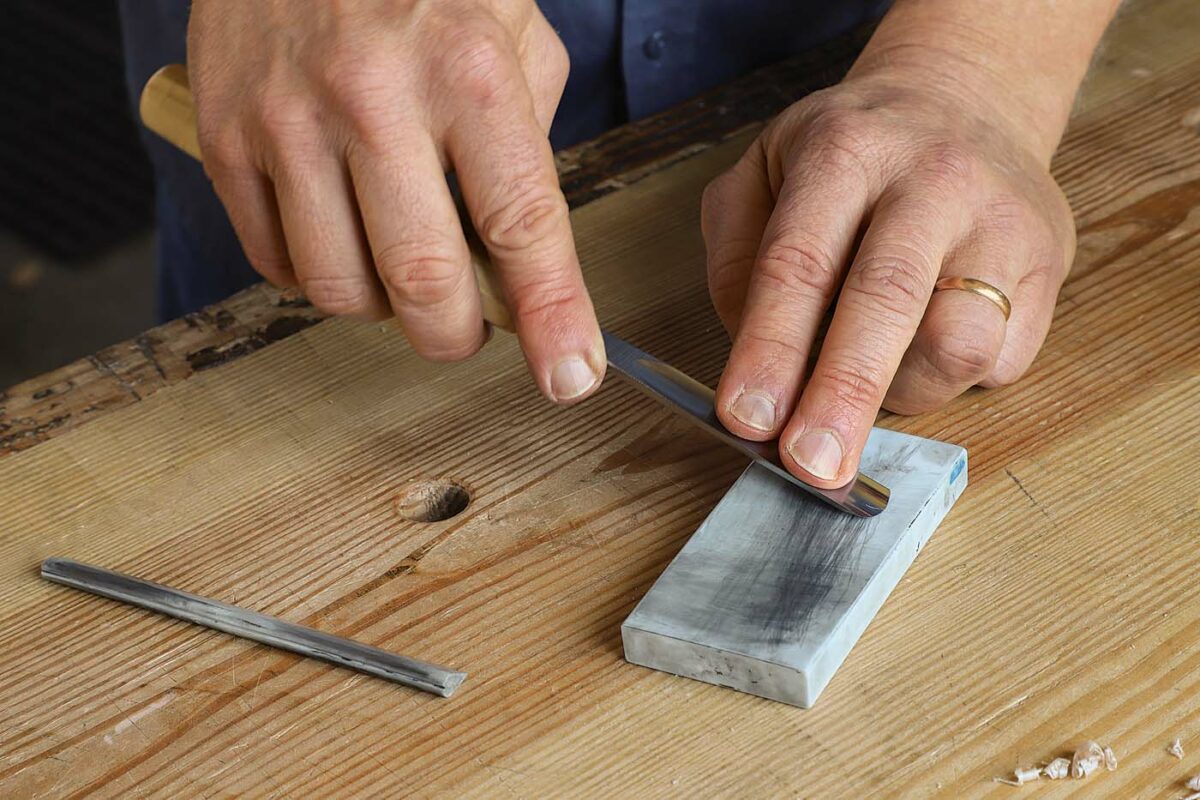
The gouge I customize is a #6 sweep, 14mm wide. Using a permanent marker and a circle template, trace the arc of a 3/4-in.-dia. circle onto the tip of the gouge. Then, with the grinder’s tool rest set at 90° to the grinding wheel, grind the gouge’s profile to the line. Once that’s done, reset the tool rest and grind a 30° bevel on the gouge. Swing the gouge’s handle back and forth to follow the curvature of the profile. Stop grinding just before reaching the edge of the tool. Then hone the gouge.
Leaf carving
|
|
|
|
Now you’re ready to start carving. There’s no further layout—the placement of the leaves is all done by eye. The leaves vary in size, with the large ones being about 1/2 in. long, the medium ones 3/8 in., and the small ones 1/4 in. As they get shorter, they also get narrower. There is no need to measure every leaf to make sure there are three distinct sizes, and you may go mad if you do. The dimensions are just a general guide. Before you begin carving the leaves on the tree, practice on a scrap board of the same species.
Begin by carving 15 or so large leaves randomly spaced within the crown and following the overall flow indicated by the drawn curves of the layout. To make the cuts, raise the handle of the gouge to an angle of about 60° to 65° above the surface and push downward. Pull the gouge straight back out. Switch to the opposite side and do the same thing, aiming the nose of the gouge for the depth achieved by the first cut. Because of the bullnose shape of the cutting edge, when the gouge reaches the proper depth, a football-shaped chip will be released. For the larger leaves, sneak up on the shape by making a small leaf, then expanding it. This prevents the grain from running out and forming a split; the smaller leaf serves as a stop cut. It also reduces any bruising of the border of the leaf behind the bevel of the gouge.
Resist the temptation to grab at a chip that won’t release. This could result in some torn fibers running along the surface. Instead, go back into the original cuts until the chip releases cleanly. Enlarge the leaf a little if necessary to tidy up the junctures and get a crisp result.
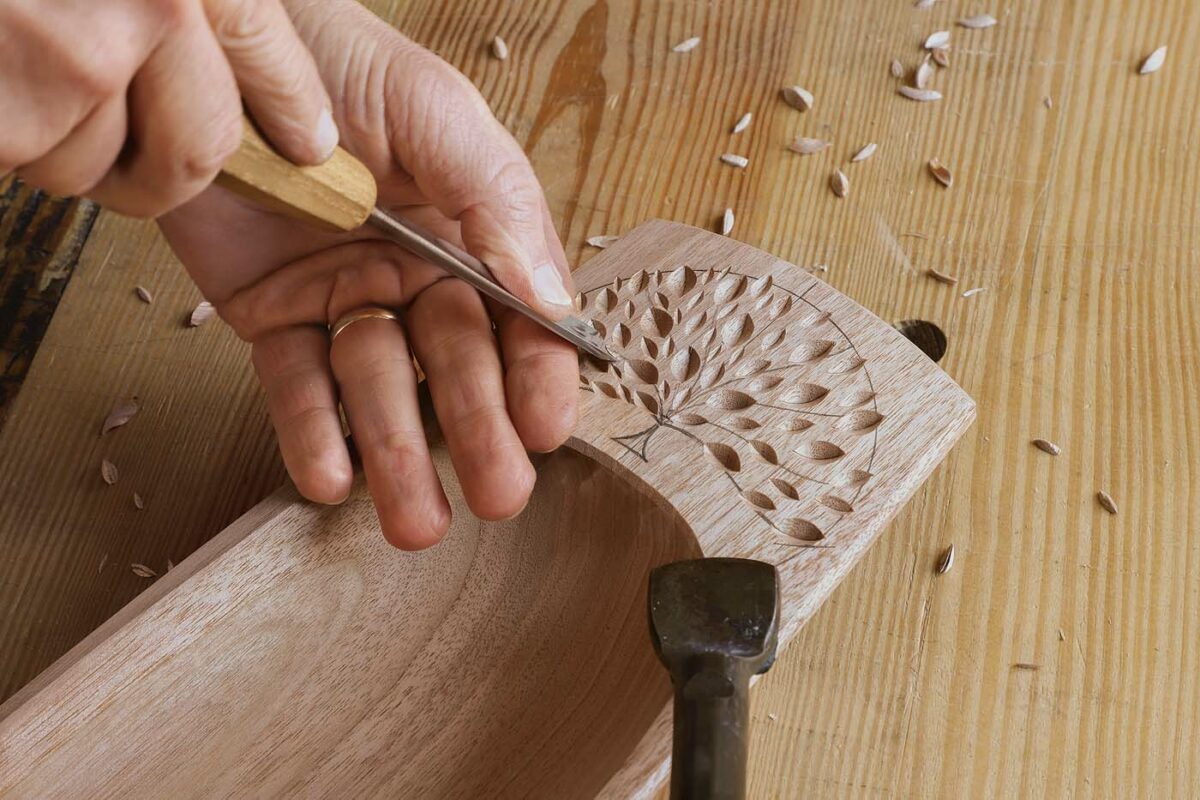
With the large leaves done, cut maybe 20 to 25 medium-ish leaves. Again, space them randomly and in harmony with the flow lines. Finish by adding 40 to 50 small leaves here and there. These go quickly—just one cut from each side and you’re done.
Where leaves of any size are near the outer edge of the crown, let some protrude past the line a bit here and there. Create just a little variation, like a barber who teases the ends of bangs with the scissors.
To the trunk
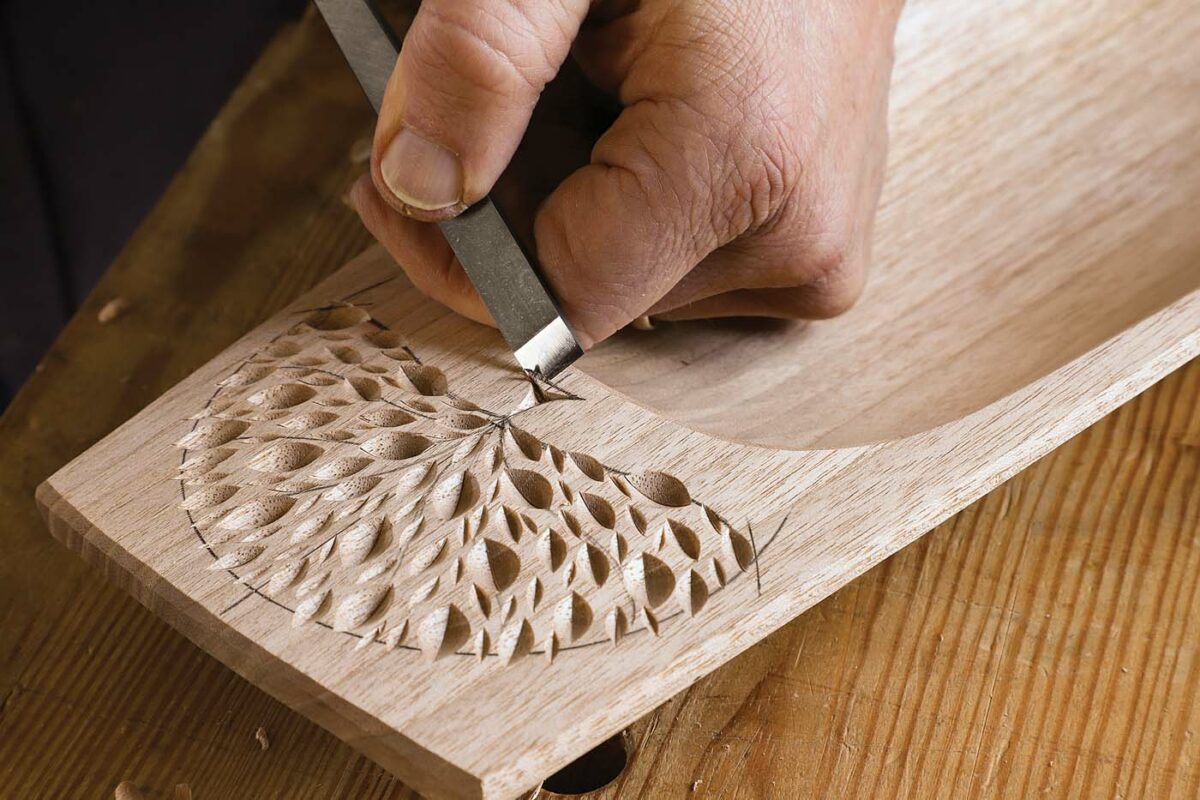
The trunk of the tree is a triangular chip-cut with concave sides. For softer woods, a knife can tackle this; for harder woods, a carving chisel is a better choice. I use a straight (#1) double-bevel carving chisel 12mm wide. Begin by making three stop cuts in the middle of the triangle connecting the center with each apex. Do this by placing one corner of the chisel at the center of the triangle, with the handle of the tool tilted back to an angle of around 60° above the surface. Push the chisel straight into the wood, maintaining the same angle, until the edge just meets the apex.
Now, beginning at the top of the triangle, place the corner of the chisel at the apex, and push forward so that the corner rides down in the bottom of the stop cut while you gradually lean the upper edge over to follow the curved outline of the side of the triangle. The chisel edge will end with the lower corner at the center of the triangle and the edge sitting right in the opposite stop cut. Repeat that on the opposite side, then finish with the base of the trunk. Tidy up the junctures and sidewalls as necessary.
If your original pencil lines were made lightly, they should erase cleanly with a white high-polymer eraser. If not, go over the surface with a finely set block plane, taking only the very lightest shavings.
-David Fisher learned his craft by reading books and articles. “The folks who wrote them were my teachers,” he says.

Carve a Bowl from a Board

Ep 12a: Carving the necklace – part 1
Master Class: Decorative chip carving
Sign up for eletters today and get the latest techniques and how-to from Fine Woodworking, plus special offers.
Download FREE PDF
when you enter your email address below.
View PDF


