We may receive a commission when you use our affiliate links. However, this does not impact our recommendations.
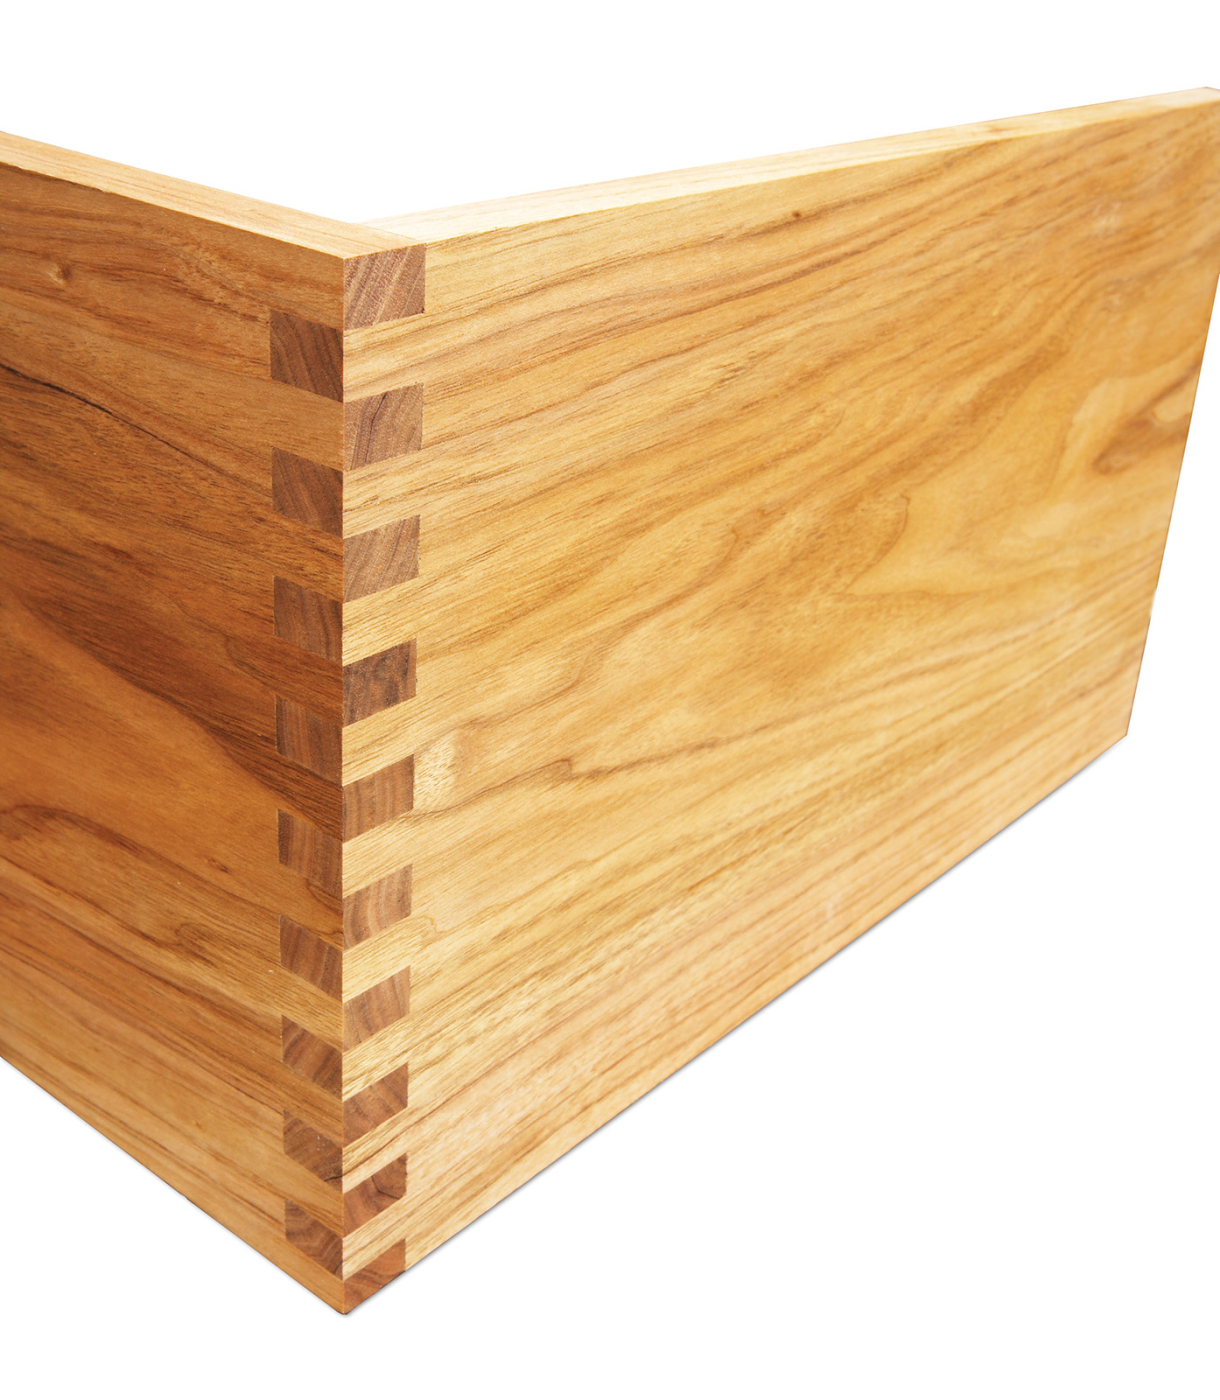 Perfect box joints of any size every time.
I got tired of making a new box joint jig each time I wanted to change the width of the joint fingers. My latest jig allows cutting fingers of any size, up to 3/4-in.-wide. The jig slides in both miter slots, so it cuts precisely, and it’s super easy to adjust, so it produces joints that fit perfectly.
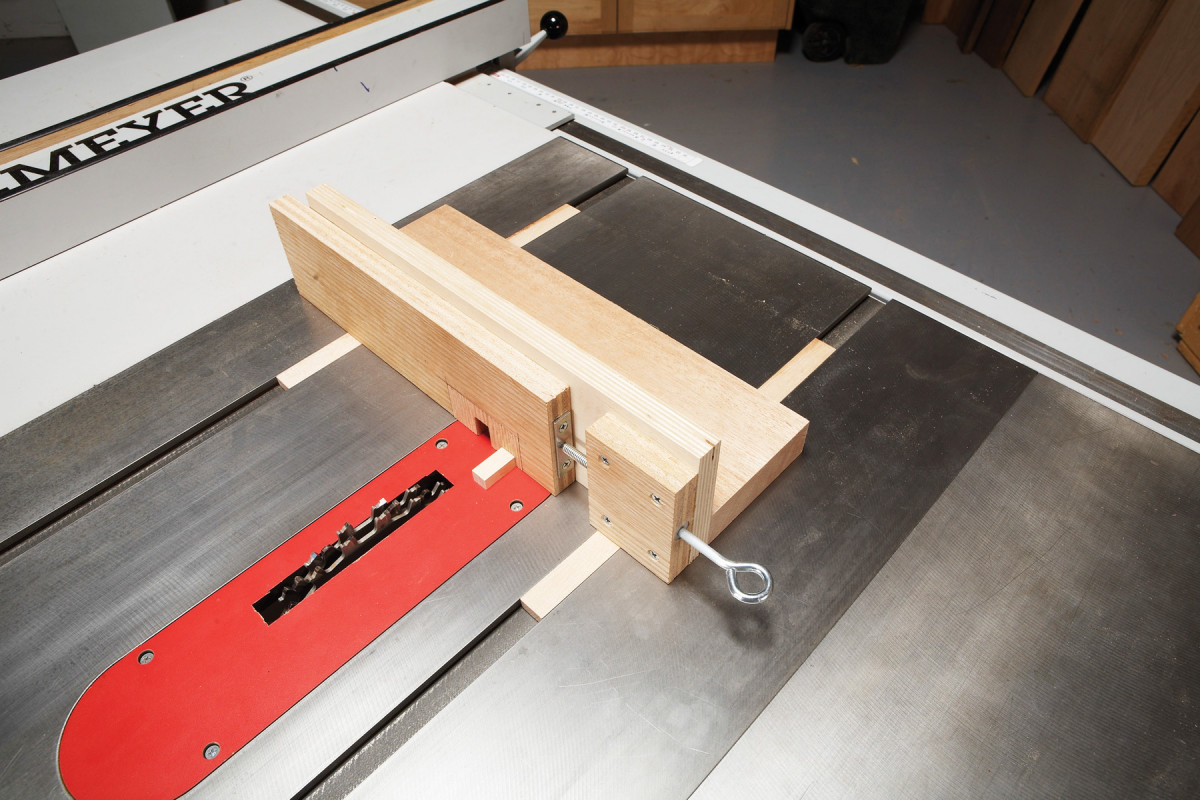
For precise cutting, the jig rides in both miter slots, just like a crosscut sled. For safety, the jig’s thick, wide base houses the blade. An adjustment screw makes it easy to dial in joints that fit perfectly.
Box Joint Jig Cut List and Diagram

 Building and Using the Jig
The jig has two fences. The fixed fence (A, Fig. A) is fastened to the base (B), which has runners (C) attached. Thumbscrews and threaded inserts secure the adjustable fence (D) to the fixed fence.
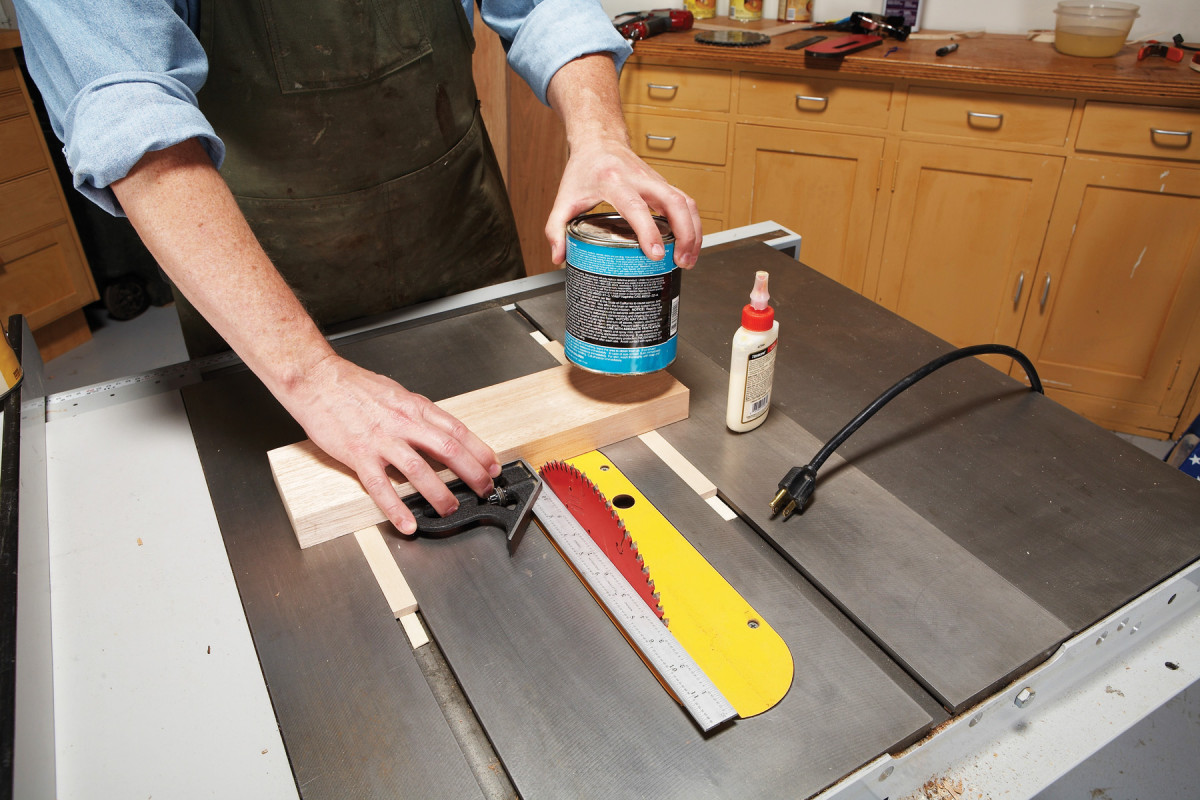
1. Start by squaring the sled to the blade. Shim the runners so they’re flush with the table and apply glue. Position the base and add weight to secure the joints.
A support block (E) glued and screwed on one end of the fixed fence holds the adjustment screw (Photo 1). To make minute fence adjustments while fitting a joint, I simply loosen the thumbscrews and turn the adjustment screw.
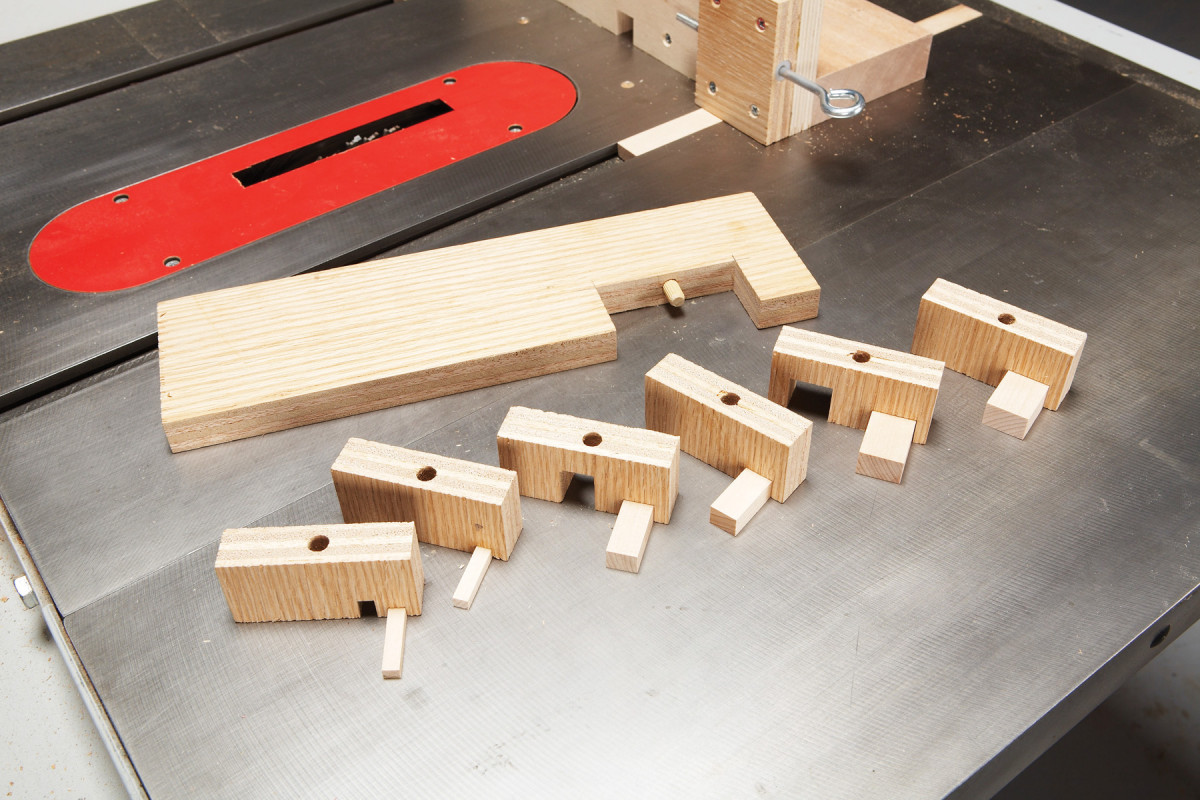
Removable inserts allow cutting box joints of any size. I make inserts in multiples, so I can install a new insert whenever I change the blade’s height for different wood thicknesses. This method eliminates tearout.
The adjustable fence has a cutout (Photo 2) that houses replaceable inserts (F). These inserts are notched for register blocks (G) that allow cutting box joint fingers of different sizes.
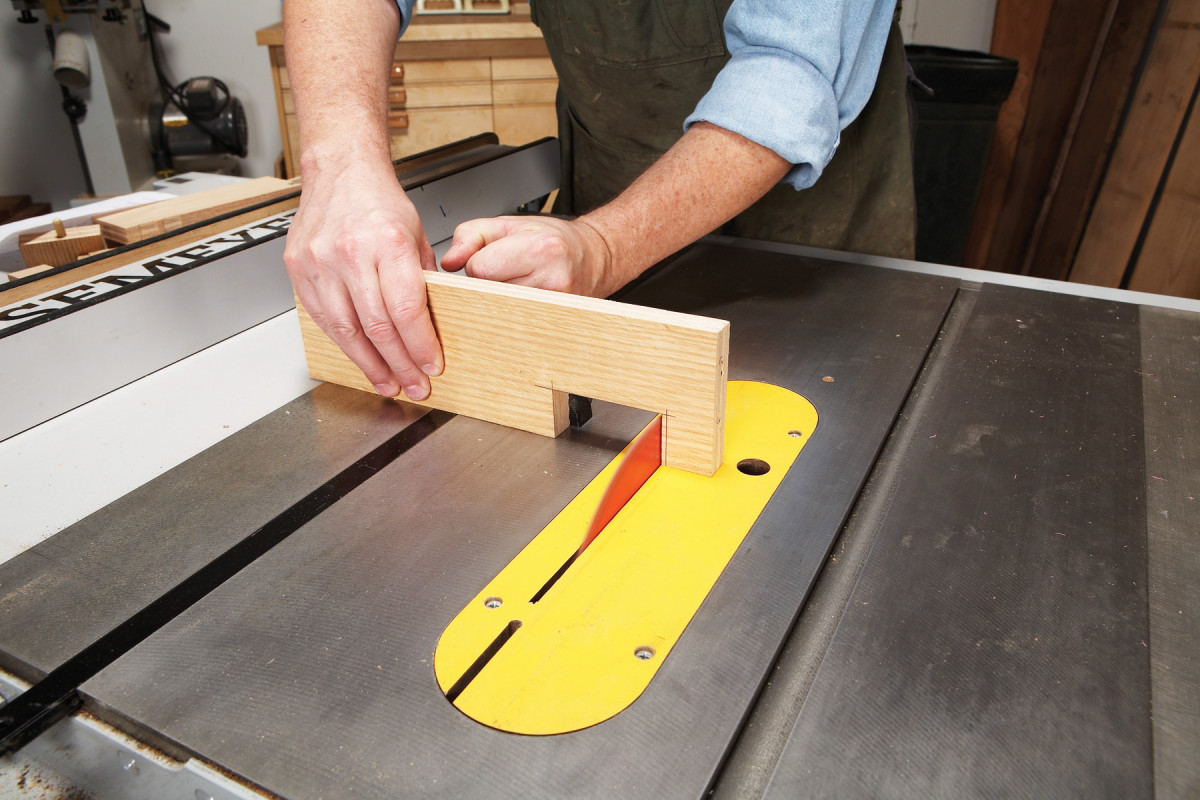
2. Saw the insert cutout in the adjustable fence by making numerous adjacent cuts. The opening is too tall to cut with a dado set.
For example, an insert with a 1/2-in.-wide register block creates 1/2-in.-wide fingers. I always make these blocks shorter in height than width (for example, my 1/2-in.-wide blocks are 3/8-in. tall), to make it easier to install and remove the workpieces.
Caution: You have to remove your saw’s blade guard to use this jig. Be Careful!
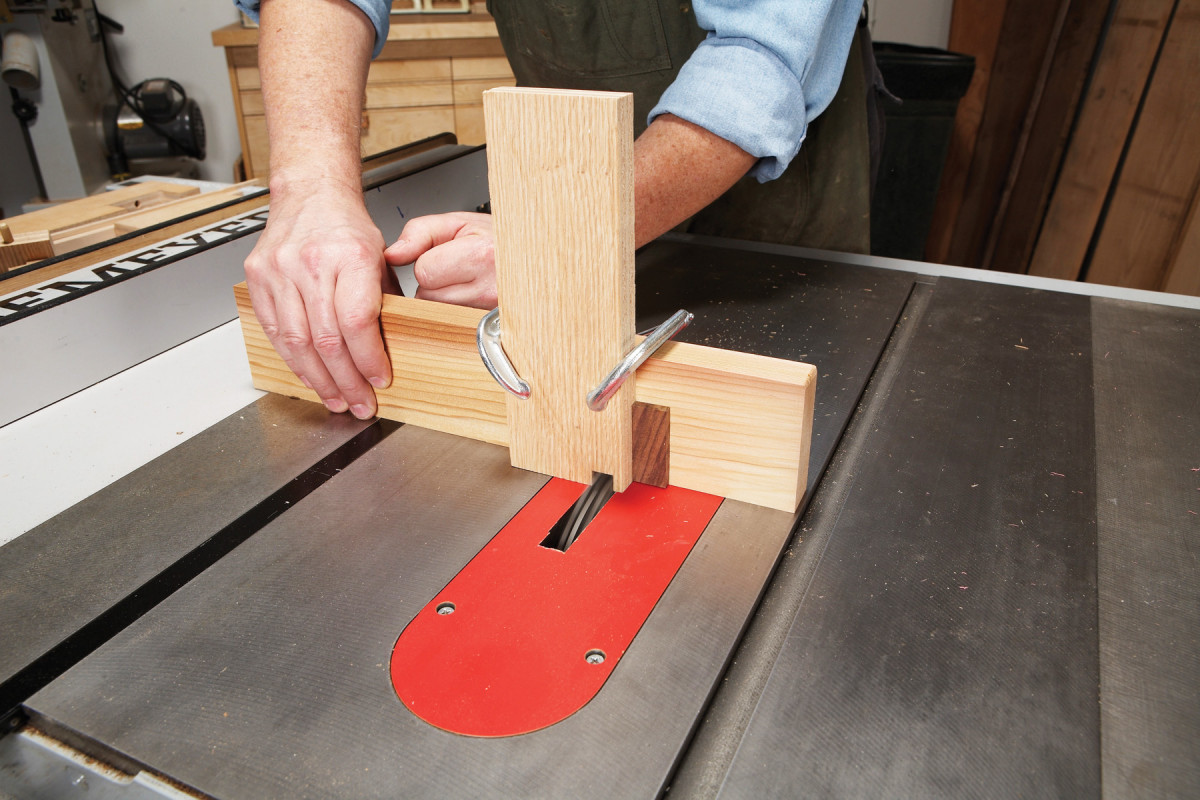
3. To make inserts in multiples, cut a notch for the register block in a long blank that’s been ripped to fit the adjustable fence’s insert opening. Use a fence with a stop block for positioning. Cut the insert to length on your miter saw and you’re ready to make another.
To make the inserts, I notch the end of a length of plywood (the same material as the adjustable fence) that I’ve ripped to fit the cutout (Photo 3). To allow cutting the whole range of box joint finger sizes, the notches must always start 1/4-in from the edge, so I use a stop block to index them.
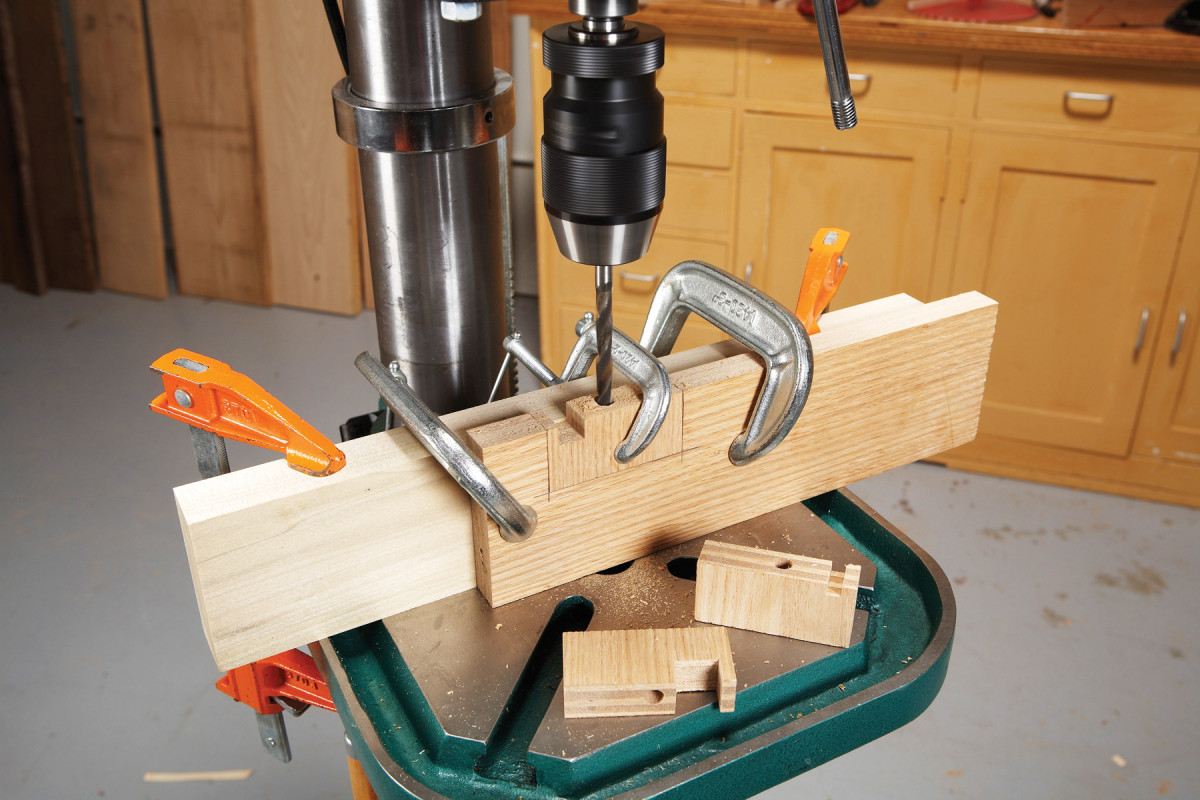
4. Drill holes for the locater dowel by installing the inserts in the adjustable fence. Drill through the inserts into the fence, so the holes align.
The width of the notch determines the width of the box joint’s fingers (for example, 1/2-in.-wide notches create 1/2-in.-wide fingers). After cutting the notches, I crosscut each insert to the exact height of the cutout. Then I install each finger insert in the cutout to drill the hole for the locator dowel (Photo 4). I don’t glue the dowel, so I can use the hole to position the fence when it’s time to drill more inserts.
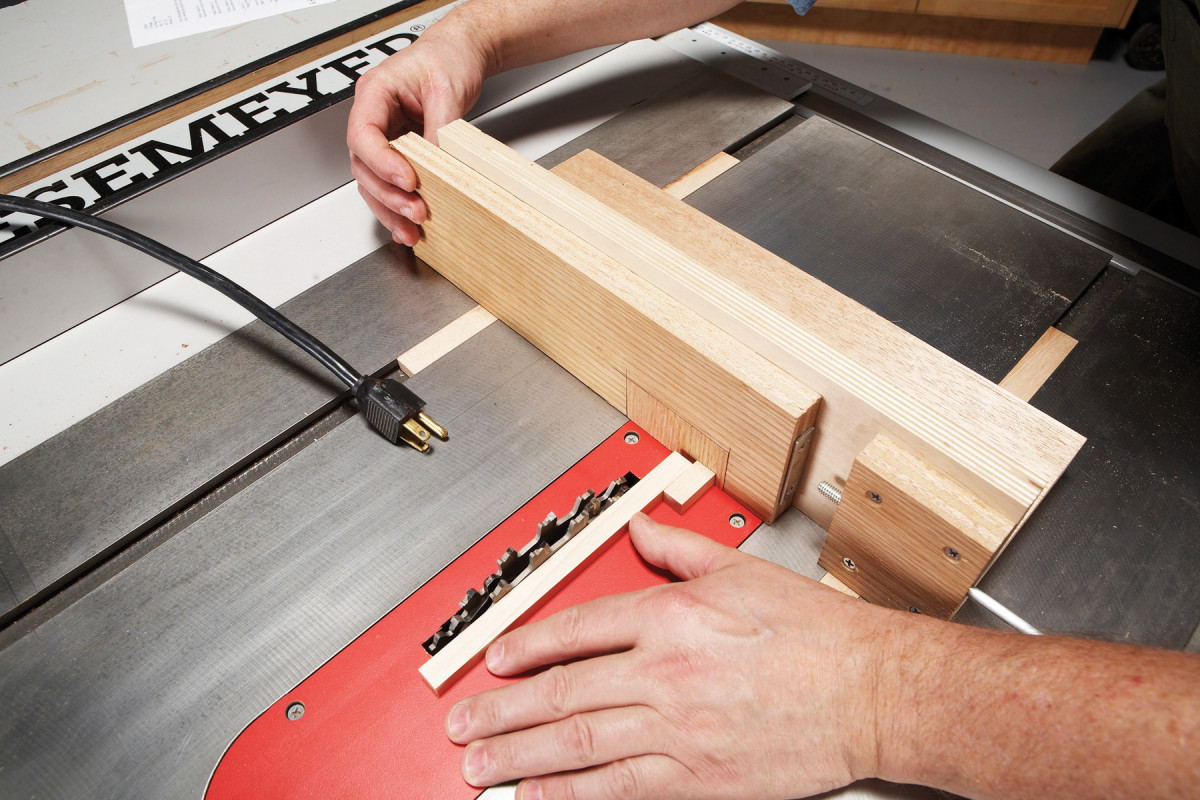
5. Use the register block blank to set up the jig. Seperate the blade and the insert’s register block by the width of the blank. Lock the adjustable fence in position.
I make register blocks (G) for the inserts by planing 12-in. lengths of maple to exactly fit the dadoes. Then I cut 2-in. pieces from each 12-in. length and glue them into the finger inserts. I save lengths of each size block for setup (Photo 5).
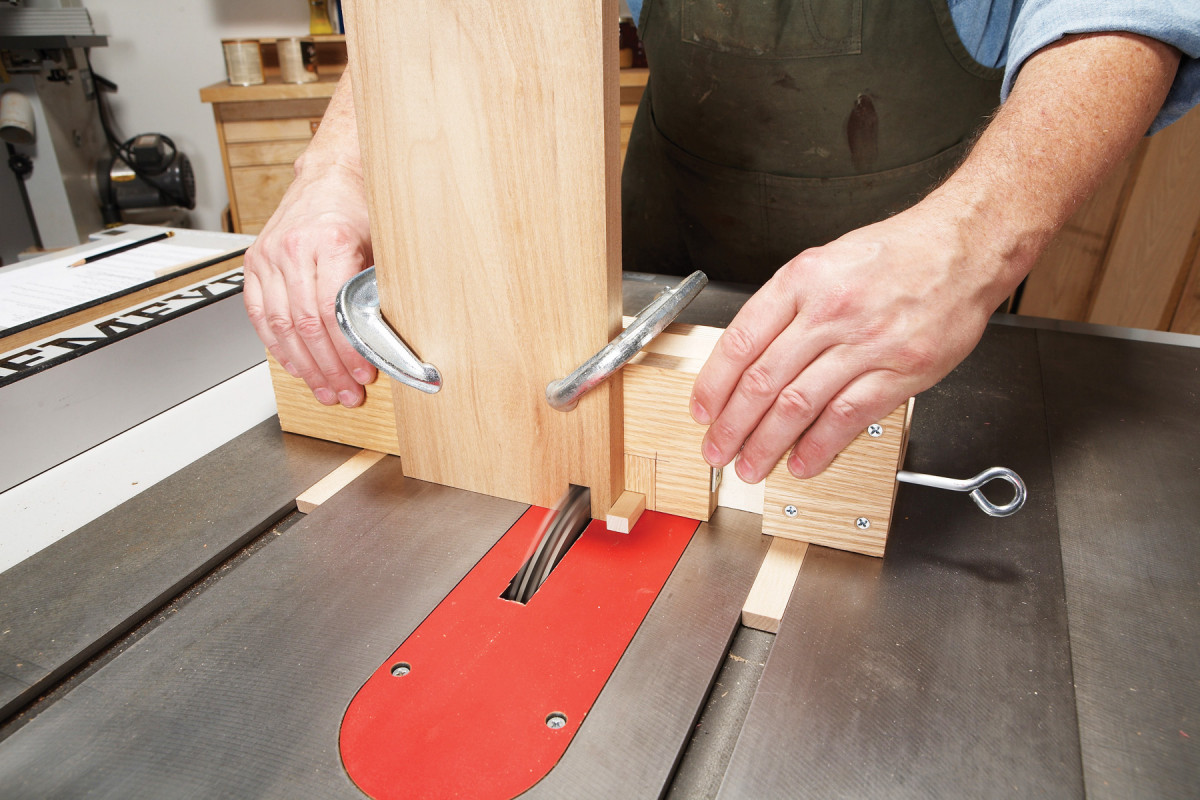
6. Cut the first socket with the workpiece butted against the register block. This cut creates the first finger. The blade’s height must match the thickness of the workpiece.
Now, I can whip out box joints like they’re going out of style (Photos 6 to 11).
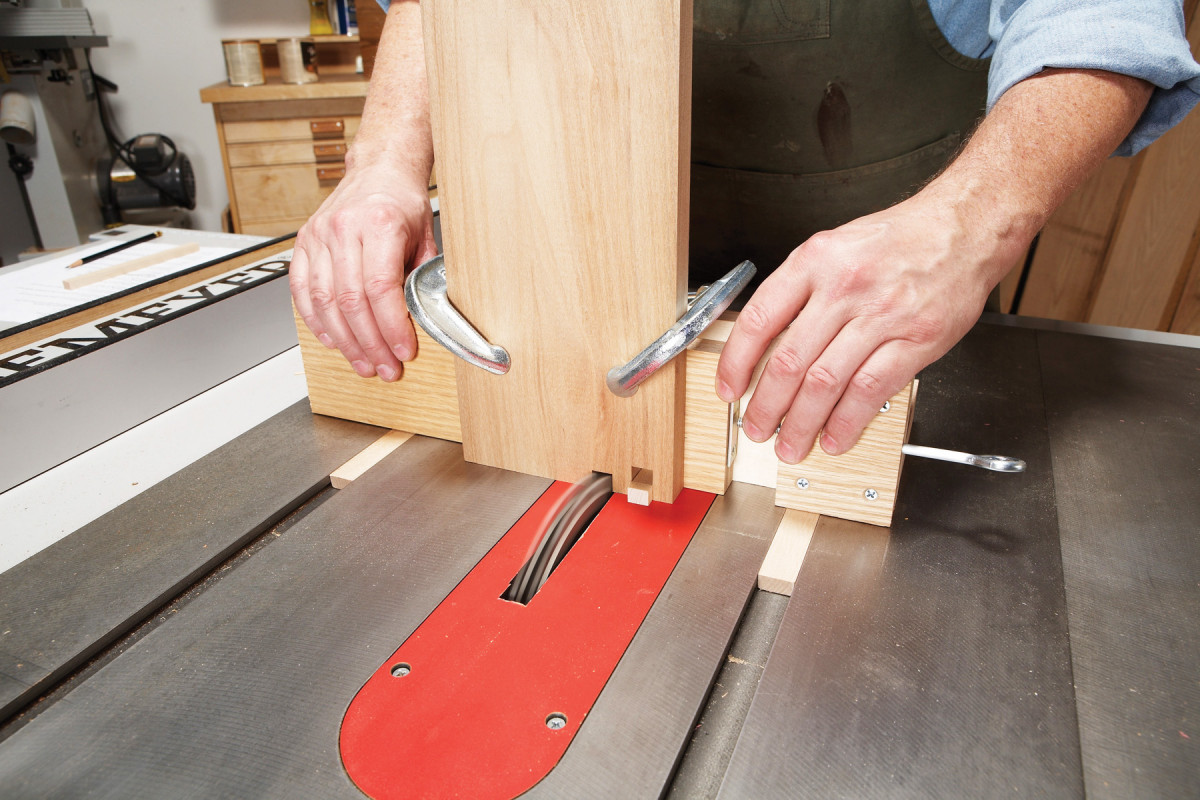
7. Cut the second socket after mounting the workpiece on the register block, using the first socket. Repeat the process to cut the rest of the sockets.
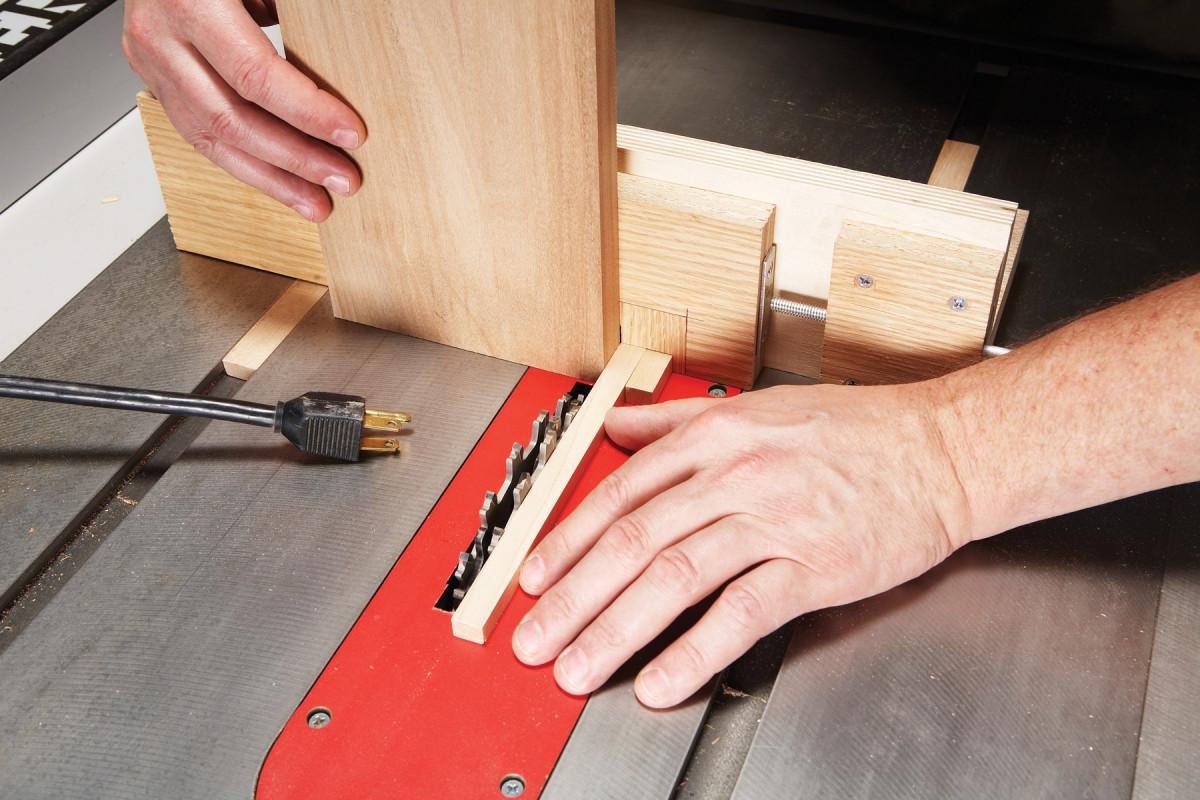
8. Use the register block blank to position the second workpiece. This piece has to begin with a socket for the joint to fit together.
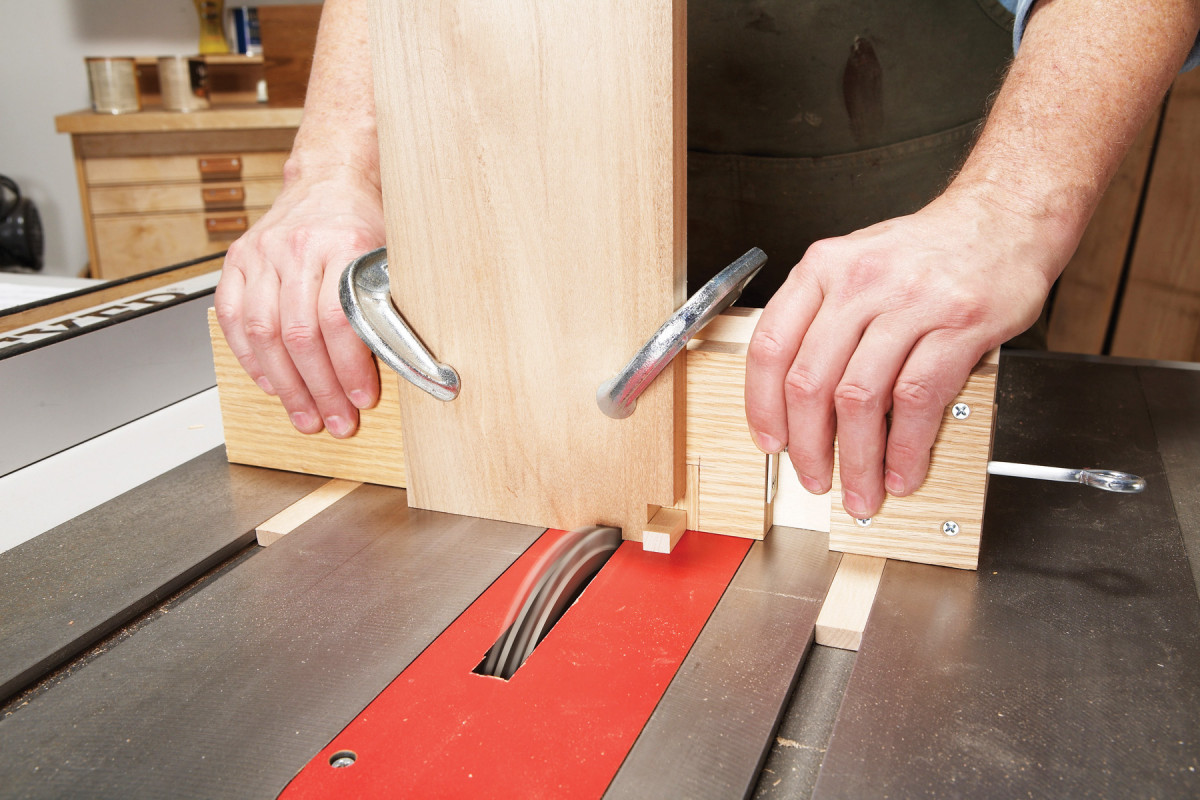
9. Butt the socket’s shoulder against the register block to cut the second socket. This step creates the first finger.
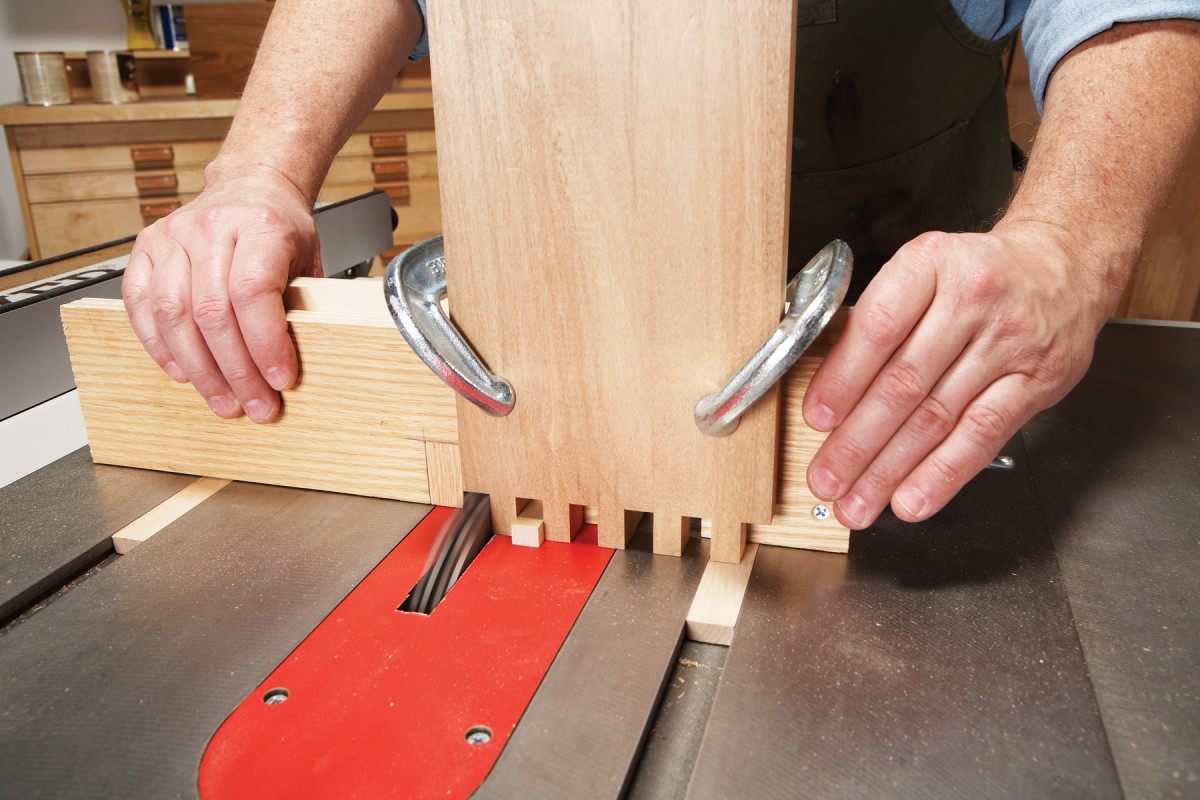
10. Cut the remaining sockets by using using the previously- cut socket to mount the workpiece.
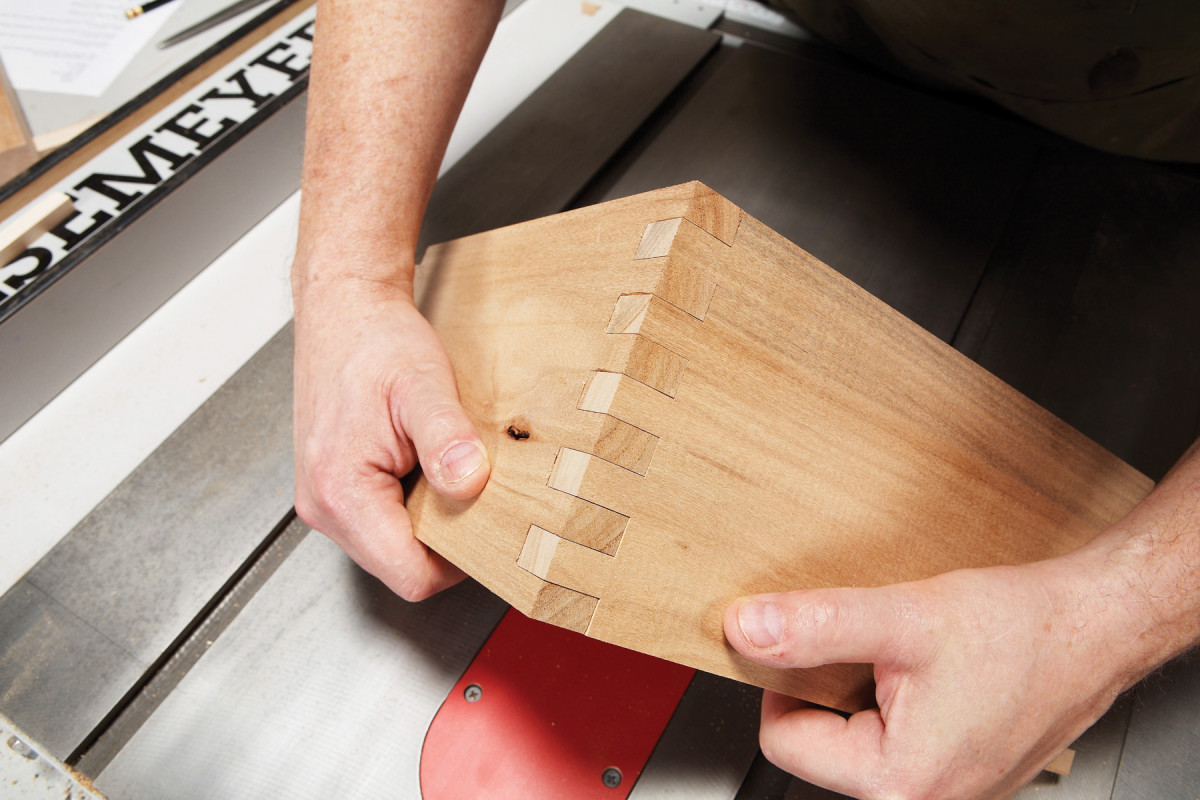
11. Test-fit the joint. If the fit is too loose, widen the fingers. Turn the jig’s adjustment screw to increase the distance between the blade and the register block. If the joint is too tight, shrink the fingers.
Adapt The Jig to Fit Your Saw
Miter slot and blade locations vary between saws, so you’ll probably have to tweak my jig to fit. On my Delta saw, the blade isn’t centered between the miter slots. If your saw’s blade is centered between the slots, you’ll have to reposition the insert cutout on the adjustable fence.
Correctly locating the cutout is important; otherwise the jig’s micro-adjustment screw might not work with all the inserts you make. With the jig installed on the saw over the retracted blade, position the adjustable fence blank 1-3/8-in. away from the support block. Then locate the cutout on the fence blank so it’s centered over the blade. Similarly, locate the threaded inserts so they’re centered in the fixed fence’s slots.
Product Recommendations
Here are some supplies and tools we find essential in our everyday work around the shop. We may receive a commission from sales referred by our links; however, we have carefully selected these products for their usefulness and quality.
