We may receive a commission when you use our affiliate links. However, this does not impact our recommendations.

Cut completed boxes from a simple glue-up.
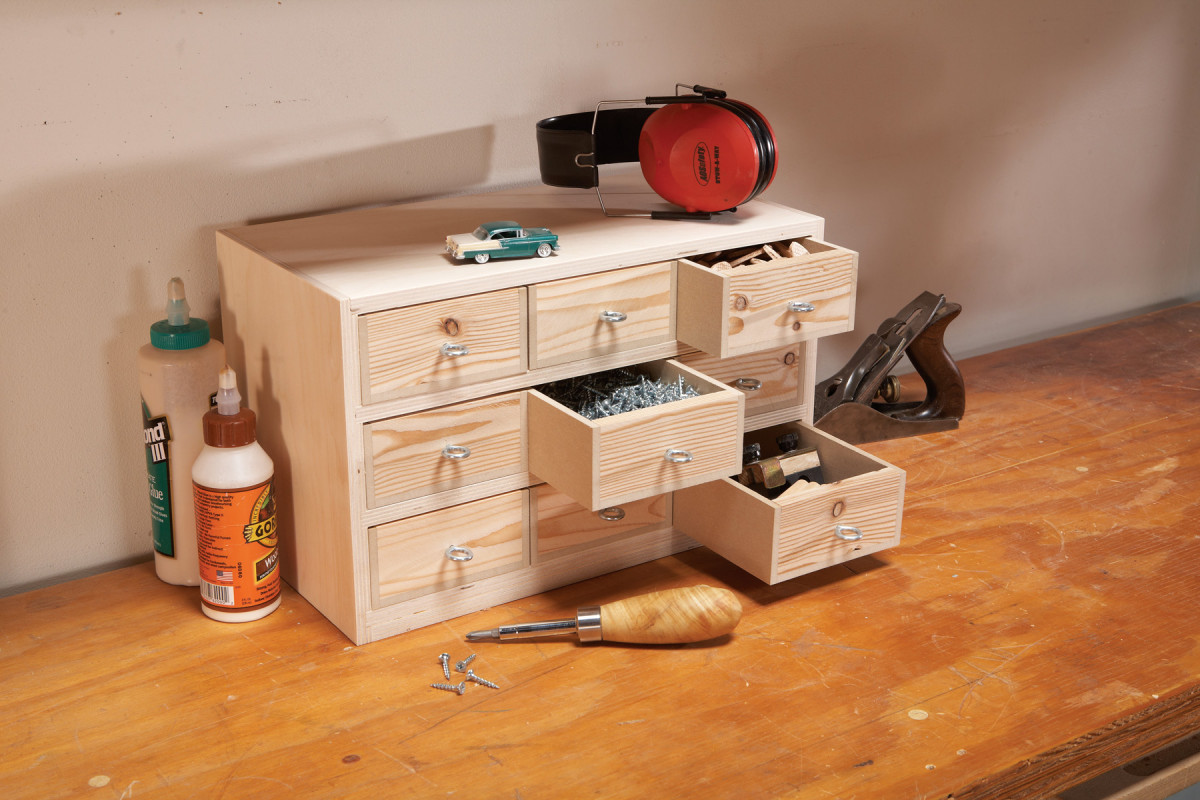
If your shop is like mine, every horizontal surface collects stuff—the necessary minutiae of woodworking. It’s all good stuff, to be sure, but it can also create a real mess. Small drawers or storage boxes are the answer, but making them individually is a pain, because each box requires cutting, fitting and assembling five pieces. That’s 45 pieces to make the nine 2-3/8″ x 5″ x 8″ boxes shown here. Here’s how I made them using only 13 pieces.
Make a ‘box roll’
The trick is to glue up one long assembly and then cut the completed drawers from it, as if you were cutting slices from a jelly roll. I use 1/4″ MDF for the sides and bottom of the assembly and suitably dry 2×4 stock milled to 1-3/8″ thick for the dividers—they’ll eventually become the box fronts and backs. The dividers determine the size of the boxes: Their width determines the height, their length determines the width and their spacing determines the depth. The length of the “box roll” assembly depends on the number of boxes and their depth. The nine boxes shown here came from a 78″ long assembly.
Start by cutting the dividers to width and length. To determine their width, subtract the thickness of the MDF bottom from the box height you’ve chosen; to determine the length, subtract the combined thickness of the MDF sides from your chosen box width. To make boxes like the ones shown here, cut 10 dividers to 2-1/8″ x 4-1/2″. Make sure the ends are square.

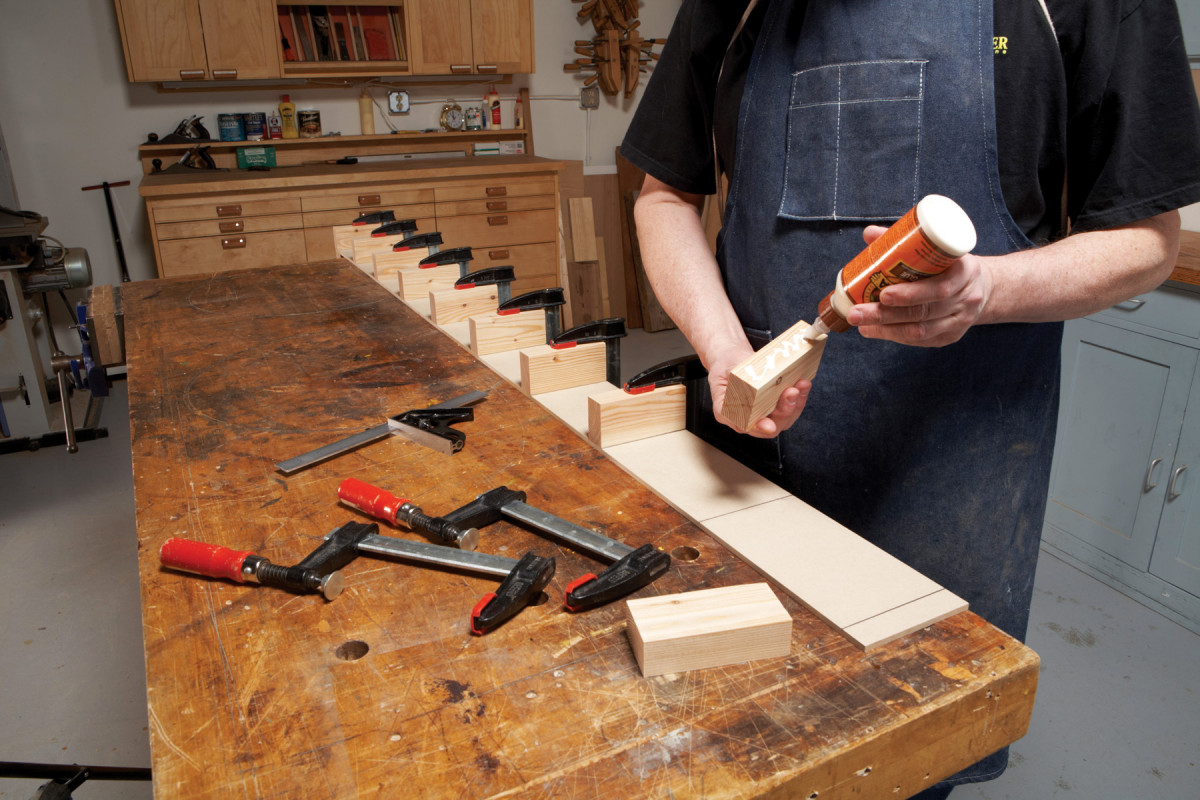
1. Glue evenly spaced dividers onto a length of 1/4″ MDF. Make sure their ends are flush with the MDF. Clamping to a flat surface distributes the pressure evenly across the joints.
Rip the 1/4″ x 78″ long MDF bottom 4-1/2″ wide, so it matches the length of the dividers. Then use a square to mark lines across it spaced 8-1/8″ (the chosen box depth plus the width of the saw kerf). Apply glue and position a divider flush with each line (and always on the same side). Make sure both ends of each divider are flush with the bottom and then clamp each divider (Photo 1). Here’s a tip: Wait five minutes before applying the clamps. This allows the glue to set, so the pieces won’t slide out of position when clamping pressure is applied. Leave the clamps on for at least 30 minutes.

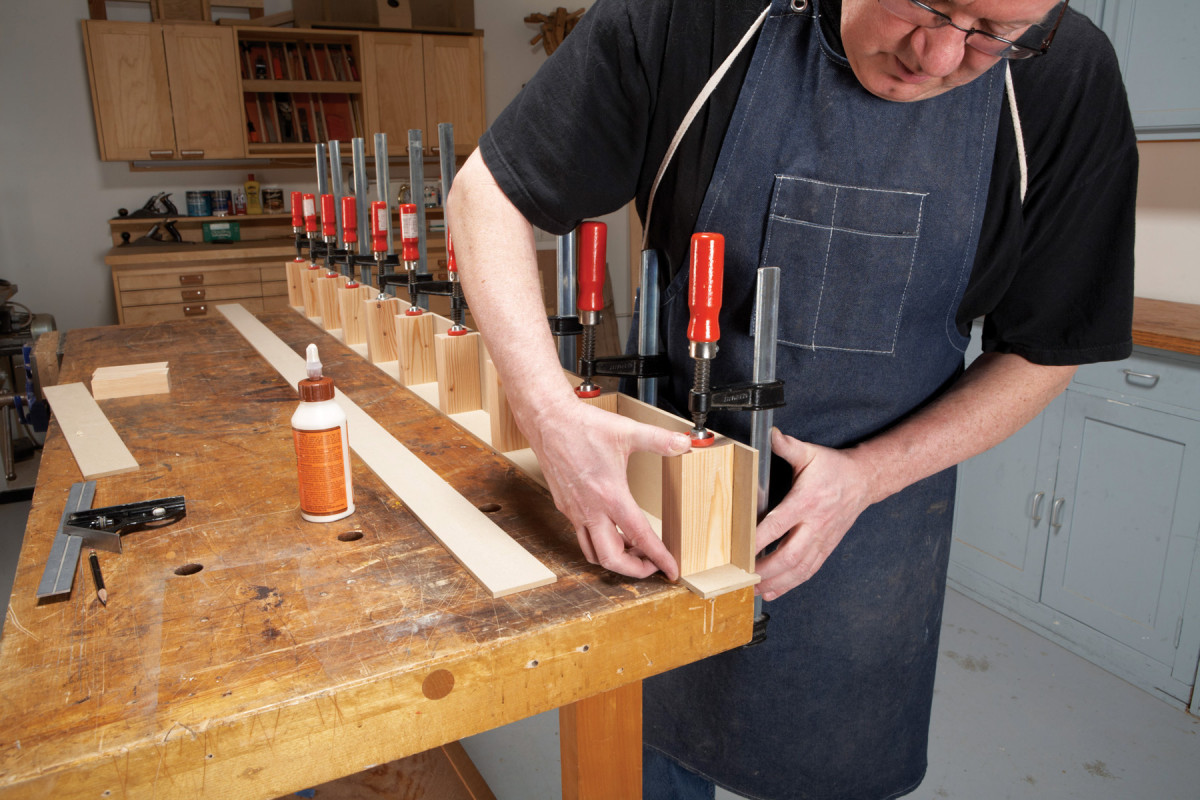
2. Glue additional lengths of MDF onto both sides of the assembly. Make sure the edges are flush.
Rip a pair of 1/4″ x 78″ long MDF sides 2-3/8″ wide so they match the height of the assembly you’ve just glued together. Glue on the sides one at a time so you can make sure they’re flush from end to end with the bottom and the dividers (Photo 2).
Cut out the boxes

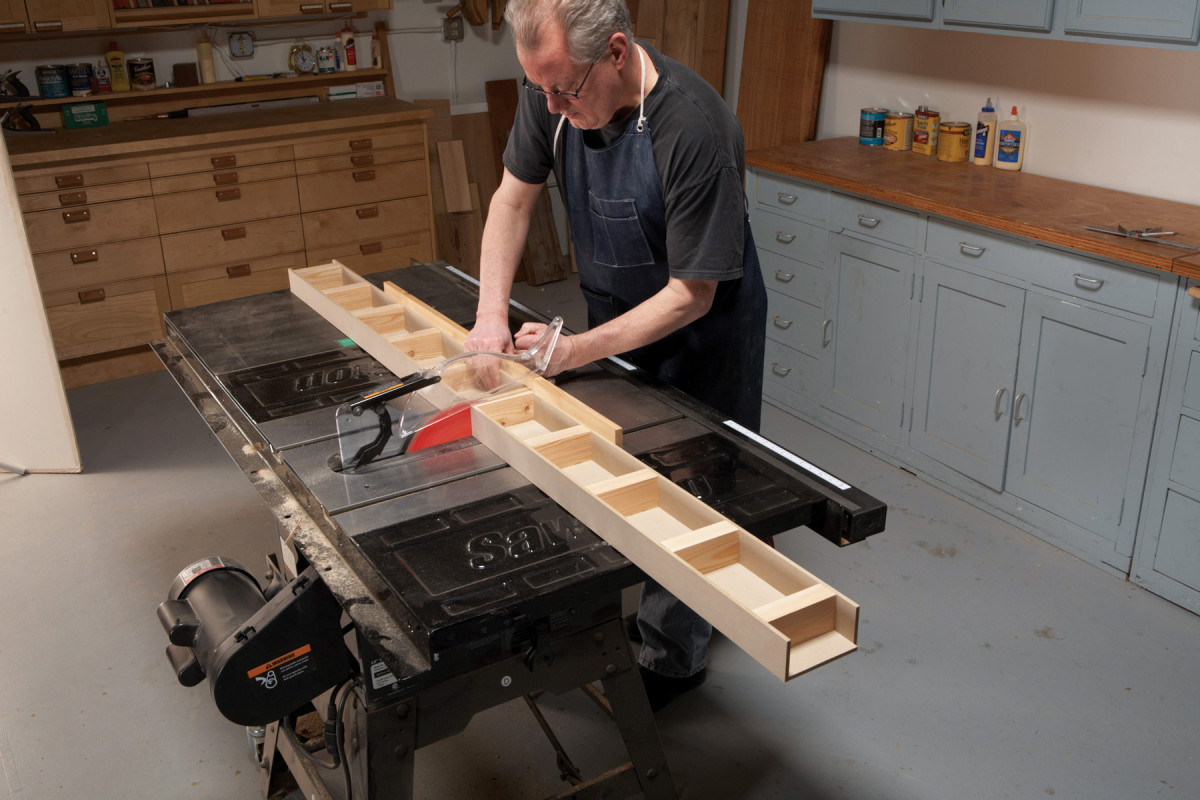
3. Cut through the centerline of each divider to create the boxes. The blade’s vertical cutting capacity determines the maximum box height.
Mark a line down the center of each divider. Then move to the tablesaw. Attach a long, stout fence to the miter gauge and use the centerlines on the dividers to cut the box roll assembly into individual boxes (Photo 3). Stand the boxes on end to check their depth—some variation is likely. If you want to make the depths consistent, choose the shortest box and use it to position a stop block on the miter gauge fence. Then cut all the other boxes to match.
Box your storage boxes
The 9-drawer storage cabinet shown at top is made of 1/2″ birch plywood. Its sides are rabbeted for the top and dadoed for the shelves. A 1/2″ x 1/2″ plywood strip fills the gap below the bottom shelf. The inside width of the assembled box measures 1/16″ more than the combined width of three storage boxes. The shelves are spaced 2-7/16″ apart. The back of the box is rabbeted for the 1/4″ back.
Product Recommendations
Here are some supplies and tools we find essential in our everyday work around the shop. We may receive a commission from sales referred by our links; however, we have carefully selected these products for their usefulness and quality.
